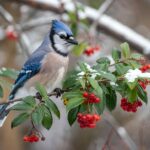
Looking for a fun activity that brings the whole family together while helping our backyard birds? Bird feeder ornaments are easy to make at home and can provide hours of entertainment as you watch birds visit your yard. These DIY projects combine creativity with nature appreciation, teaching children about local wildlife while creating beautiful decorations that serve a practical purpose.
You’ll be amazed at how simple materials can be transformed into functional bird feeders that also add charm to your outdoor space. Whether you’re planning a weekend craft session or looking for activities during school breaks, these projects offer something for everyone from toddlers to grandparents.
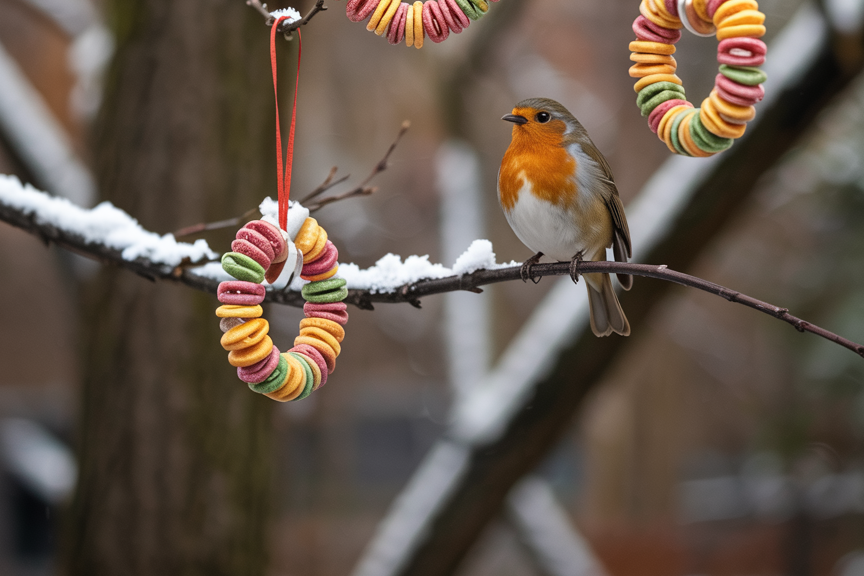
1) Cookie Cutter Seed Shapes
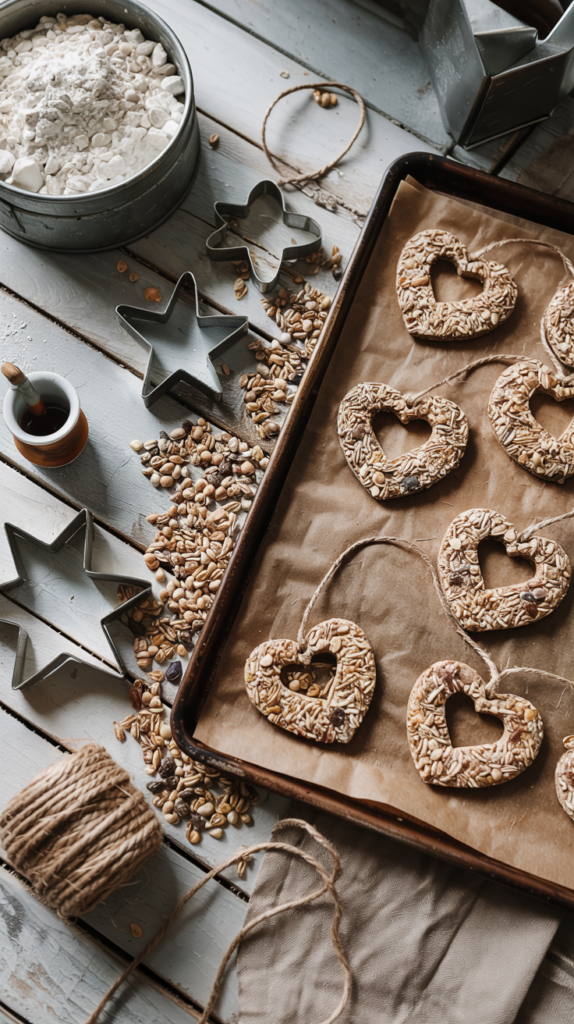
Making cookie cutter seed shapes is a super easy and fun project for bird lovers of all ages! You only need a few simple materials to create these beautiful ornaments that birds will flock to.
- Start with 3/4 cup of flour, 1/2 cup of water, 1 tablespoon of corn syrup, and 1 packet of unflavored gelatin. Mix these ingredients in a bowl until they form a dough-like consistency.
- Roll out your dough on a floured surface until it’s about 1/4 inch thick. This thickness makes the ornaments strong enough to hold seeds but thin enough to dry properly.
- Use your favorite cookie cutters to create fun shapes – stars, hearts, and circles work great! Don’t forget to use a straw or skewer to poke a hole at the top for hanging.
- Press bird seed firmly into both sides of your shapes. Birds love a variety of seeds, so mix sunflower seeds, nyjer, and millet for the best results!
- Let your ornaments dry completely – this usually takes 24-48 hours depending on humidity. Flip them halfway through drying to ensure both sides dry evenly.
- Once dry, thread some twine, ribbon, or string through the hole and hang your creations from tree branches or your bird feeding station. Watch as birds discover your handmade treats!
These ornaments work especially well in winter when natural food sources are scarce. They make beautiful decorations for your yard while helping local birds!
Why we love it: You get to watch birds enjoy your handmade creations while knowing exactly what ingredients went into them – no preservatives or additives that might harm the birds!
2) Pine Cone Feeders
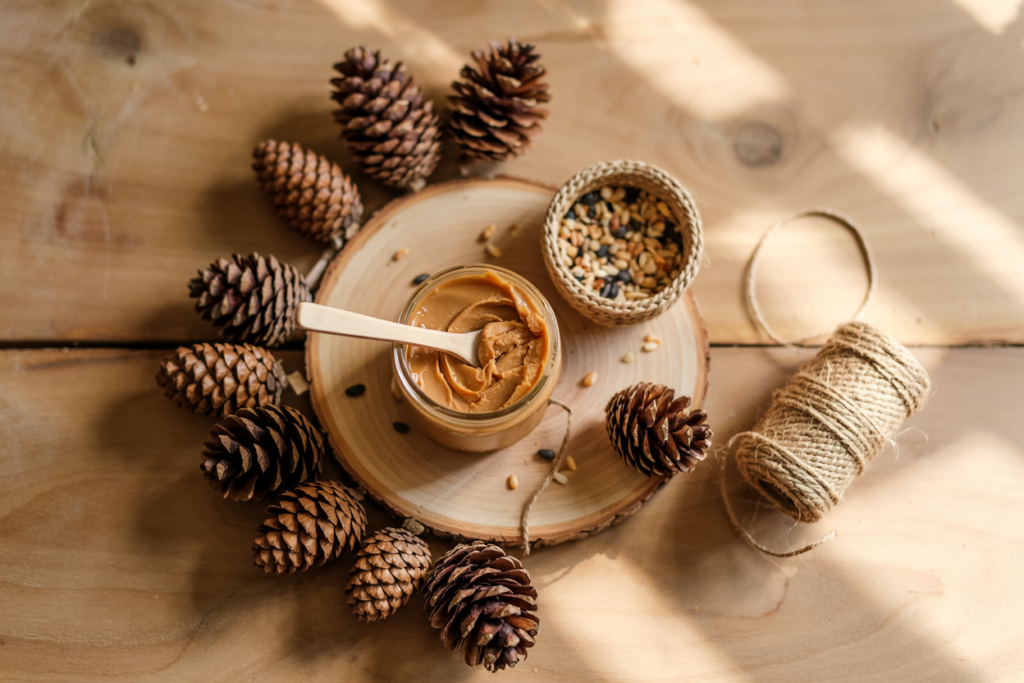
Pine cone bird feeders are one of the easiest and most enjoyable DIY projects you can make. You probably already have most of the materials at home! All you need are pine cones, peanut butter, bird seed, and some string or twine.
- Start by tying a piece of string around the top of your pine cone. This will be how you hang your feeder. Make sure it’s secure so it won’t fall when birds land on it.
- Next, use a butter knife or spoon to spread peanut butter all over your pine cone. Get it into all those little crevices! The stickier, the better.
- Now comes the fun part! Roll your peanut butter-covered pine cone in bird seed until it’s completely coated. You can use a shallow dish or plate to make this step less messy.
- Once your pine cone is covered in seed, find a nice branch or hook to hang it from. Try to place it where you can easily watch the birds enjoy their treat, but away from squirrels if possible.
These feeders are perfect for attracting smaller birds who can eat seeds from an opened pine cone. Birds like chickadees, nuthatches, and finches will love visiting your homemade creation!
You can make these feeders any time of year, but they’re especially wonderful as winter activities when birds need extra food. They also make great gifts or holiday decorations that serve a purpose.
Why we love it: These simple feeders bring so much joy as you watch hungry birds discover your handmade treat, plus they help teach kids about caring for wildlife in a hands-on way!
3) Gelatin Seed Blocks
Gelatin seed blocks are simple to make and attract a variety of birds to your yard. You’ll need unflavored gelatin, water, and a mix of bird seeds to create these fun feeders.
- Start by dissolving unflavored gelatin in warm water according to package directions. Most grocery stores sell unflavored, undyed gelatin in little boxes.
- Once your gelatin is dissolved, mix in your bird seed until it’s thoroughly coated. You can use any combination of seeds that local birds enjoy. Many birds love a mixture of sunflower seeds, millet, and cracked corn.
- Pour your seed mixture into cookie cutters or small containers to create shapes. Remember to poke a hole near the top using a straw before the mixture sets, so you can thread string through later.
- Allow your seed blocks to set completely – usually overnight in the refrigerator works best. When firm, gently remove them from the molds and thread string or ribbon through the holes.
- Hang your gelatin seed blocks from tree branches where you can easily watch the birds enjoy their treats. These feeders work well during cool weather but avoid using them during very hot days when the gelatin might melt.
Why we love it: These translucent seed blocks catch the sunlight beautifully while attracting chickadees, nuthatches, and finches who love pecking at these tasty treats!
4) Cheerios Bird Rings
Making Cheerios bird rings is a fun and simple project that both kids and adults will enjoy. All you need is some pipe cleaners and Cheerios cereal to get started.
- Thread the Cheerios onto pipe cleaners, filling each one about halfway. Then bend the pipe cleaner into a circle and twist the ends together to secure your ring shape.
- You can make these rings in different sizes by using longer or shorter pipe cleaners. The larger rings can be hung as ornaments on trees in your yard.
- For extra color, try alternating regular Cheerios with the fruity or honey-flavored varieties. Birds aren’t picky and will enjoy the variety just as much as the plain ones.
- Hang your Cheerios rings outside using colorful ribbon or string. Place them where you can watch the bird activity from a window.
These feeders are perfect for smaller songbirds like chickadees, finches, and sparrows. They’ll perch right on the ring while they eat the Cheerios.
Remember to make new rings when the old ones are empty or get soggy from rain. The cereal will naturally decompose, making this an environmentally friendly option.
Why we love it: The simplicity makes it perfect for even the youngest crafters, and there’s something magical about watching tiny birds balance on the rings you created together.
5) Egg Carton Feeders
Egg cartons are perfect for making simple bird feeders! These recycled containers can be transformed into charming feeders with just a few supplies you probably already have at home.
- To make an egg carton feeder, start by cutting the lid off a cardboard egg carton. The cup section will become your feeder base. Poke holes in each corner and thread string through to create a hanging system.
- Let the kids decorate the outside with non-toxic paint or markers. Bright colors will attract birds and add a fun touch to your outdoor space. Just make sure the paint is completely dry before hanging.
- Fill each cup section with different types of bird seed. This creates a buffet effect that will attract various bird species to your yard.
- For extra durability, you can brush the inside of the cups with peanut butter before adding seeds. This helps seeds stick better and provides extra protein for your feathered visitors.
- Hang your completed feeder from a tree branch where you can easily see it from a window. Make sure it’s high enough to keep it safe from neighborhood cats.
Why we love it: This project uses materials headed for the recycling bin and turns them into a practical bird feeding station that helps children learn about conservation while watching different bird species visit their creation.
6) Citrus Half Feeders
Citrus half feeders are a bright and cheerful way to attract birds to your yard. They’re super simple to make and use materials you might already have in your kitchen. All you need are some orange, grapefruit, or lemon halves after you’ve enjoyed the fruit inside!
- Start by scooping out any remaining fruit pulp from your citrus halves. Be sure to leave the rind intact as this will be your bird feeder bowl. Poke three or four holes near the rim and thread string through them to create a hanging cradle.
- Fill your citrus half with bird seed, nuts, or chunks of fruits that birds enjoy. Many wild birds are attracted to the bright colors and sweet scent of the citrus rind, making this a naturally appealing feeder.
- Hang your citrus feeder from a tree branch where you can easily see it from a window. These feeders are biodegradable, so they’ll naturally decompose after serving their purpose as bird feeders.
This craft is perfect for kids since there’s no need for power tools or complicated assembly. You can make several at once during a family orange juice morning or after preparing a fruit salad!
Remember to check on your feeder every day or two. The citrus will eventually start to break down, especially in wet weather, so you’ll want to replace it before it falls apart.
Why we love it: The bright colors add a pop of cheerfulness to your yard while attracting songbirds, and when the feeder is past its prime, it simply returns to nature without creating waste!
7) Twig and Peanut Butter Spread
This simple bird feeder combines natural materials with a tasty treat birds love. All you need are some sturdy twigs, peanut butter, and bird seed to create an attractive feeding station for the birds.
- Start by collecting a few twigs from your yard. Look for sturdy branches about 6-8 inches long that can hold the weight of small birds. Rinse and dry them thoroughly before using.
- Spread a generous layer of peanut butter along each twig. You can use a knife or small spatula to apply an even coating. Make sure to cover most of the surface area but leave a clean spot at one end for handling.
- Next, roll your peanut butter-covered twigs in bird seed until well coated. The seeds will stick to the peanut butter creating an irresistible treat for birds.
- Place your finished twig feeders in bushes or hang them from tree branches using natural twine. Position them where you can easily view the visiting birds from your window.
This project works well in all seasons but is especially helpful during winter when natural food sources are scarce. Cardinals, chickadees, and titmice particularly enjoy these simple feeders.
You can make this a family activity! Children love rolling the sticks in seeds and watching birds come to enjoy their creations. It’s a great way to connect kids with nature.
Why we love it: This project uses items you likely already have at home and creates natural perches that mimic how birds feed in the wild.
8) Bottle Cap Seed Holders
Bottle cap seed holders are a super easy and fun craft that turns trash into a treasure for birds! You can use plastic or metal bottle caps from water bottles, soda, or juice containers.
- To make these cute mini feeders, start by cleaning your bottle caps thoroughly. Once dry, use a small drill or hammer and nail to make tiny drainage holes in the bottom.
- Next, add a strong glue like hot glue or waterproof craft glue around the edge of each cap. Attach colorful ribbon, twine, or string in a loop shape for hanging.
- You can paint the caps with non-toxic paint to make them more festive. Bright colors will attract birds and make your ornaments stand out on trees or hanging from porches.
- Fill each cap with small seeds like nyjer or millet. These small seeds work best as they stay in the shallow caps better than larger seeds.
This project is perfect for kids since it uses simple materials and requires minimal crafting skills. You can make dozens of feeders from caps you might otherwise throw away!
Try adding small decorations around the rim like tiny beads or buttons. Just make sure everything is securely attached so nothing falls off for birds to accidentally eat.
Hang your bottle cap feeders at different heights on trees, bushes, or from your porch. The small size makes them perfect for attracting tiny songbirds like chickadees and finches.
Why we love it: These tiny feeders help teach kids about recycling while creating a practical bird feeder that attracts the smallest and most colorful backyard birds!
9) Yarn Wrapped Ornaments
Yarn wrapped ornaments are a simple yet colorful addition to your bird feeding station. These easy crafts use ordinary materials to create eye-catching feeders that birds will love.
To make yarn wrapped ornaments, you’ll need some colorful yarn, a small cardboard shape, and birdseed. Cookie cutters work great as templates for your shapes!
- Start by cutting your cardboard into a fun shape like a star, heart, or circle. Next, poke a small hole at the top and thread a piece of string through it for hanging.
- Apply a thin layer of non-toxic glue to your cardboard shape. Begin wrapping colorful yarn around it, making sure to cover the entire surface. The wool or acrylic thread works best for this project.
- Once your shape is completely covered in yarn, let it dry overnight. The next day, brush another layer of non-toxic glue over the yarn and sprinkle birdseed onto it.
- Make sure to press the seeds gently into the glue so they stick well. Allow your ornament to dry completely before hanging it outside.
These ornaments look beautiful hanging from tree branches where birds can easily find them. The bright colors will also attract birds to your yard.
You can create different shapes for different seasons – hearts for Valentine’s Day, stars for winter, or flowers for spring. The patterns and decorative elements make each ornament unique.
This craft is perfect for children of all ages since it doesn’t require any sharp tools. Even very young kids can help with wrapping yarn or sprinkling seeds.
Why we love it: These colorful feeders double as beautiful garden decorations while providing food for the birds—bringing both beauty and wildlife to your yard!
10) Clay Impression Feeders
Clay impression feeders are simple yet beautiful bird feeders that you can make with air-dry clay. These feeders allow you to create unique designs by pressing leaves, flowers, or other natural items into the clay to leave decorative impressions.
You’ll need air-dry clay, a rolling pin, cookie cutters, natural items for impressions, and string or twine. Clay should have a clay-like consistency for modeling and working.
- Start by rolling out your clay to about 1/4 inch thickness. Use cookie cutters to cut shapes, or form them by hand. Press leaves, flowers, or even lace into the clay to create pretty patterns.
- Make a hole near the top for hanging before the clay dries. Once your impressions are made, allow the clay to dry completely according to package directions. This usually takes 24-48 hours.
- Once dry, paint your feeder if desired. Many crafters enjoy using bright colors that attract birds or natural tones that blend with the garden. Apply a waterproof sealer to protect your creation from the elements.
- To make it functional as a bird feeder, create a shallow depression in the center before drying. This will hold seeds or other bird treats. Some designs work well when hung from trees, while others can be mounted on posts.
These feeders are especially popular for local crafts fairs or club projects. They make thoughtful handmade gifts for bird lovers and gardeners.
Remember that some birds need mud for nesting, so your clay creation might remind them of natural materials they use themselves!
Why we love it: These feeders combine artistic expression with functionality, allowing you to create personalized garden art that serves local wildlife while showcasing the beauty of natural impressions.
What Type of Ornament Will You Make?
Choosing the right bird feeder ornament for your project depends on your skill level, available materials, and who will be helping you make it.
Ready to create something special? Choose your ornament style and gather your supplies. The neighborhood birds will thank you!