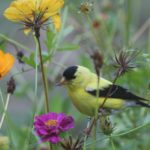
Want to attract colorful birds to your backyard this spring? Making a pine cone bird feeder is a fun and easy project that anyone can do. With just a few simple supplies, you can create a beautiful feeder that birds will love.
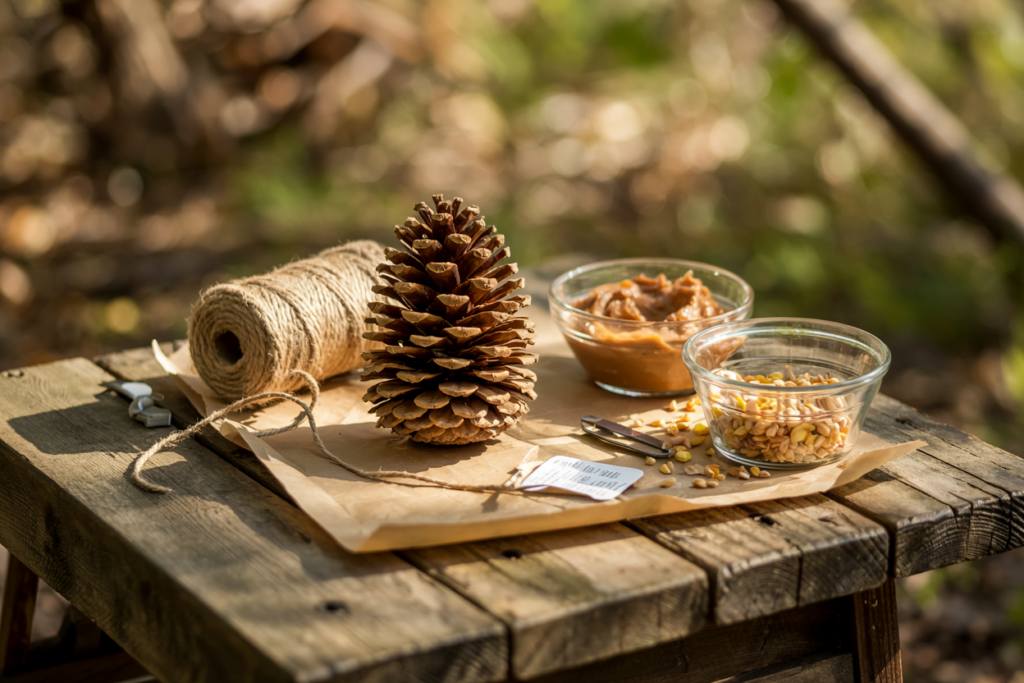
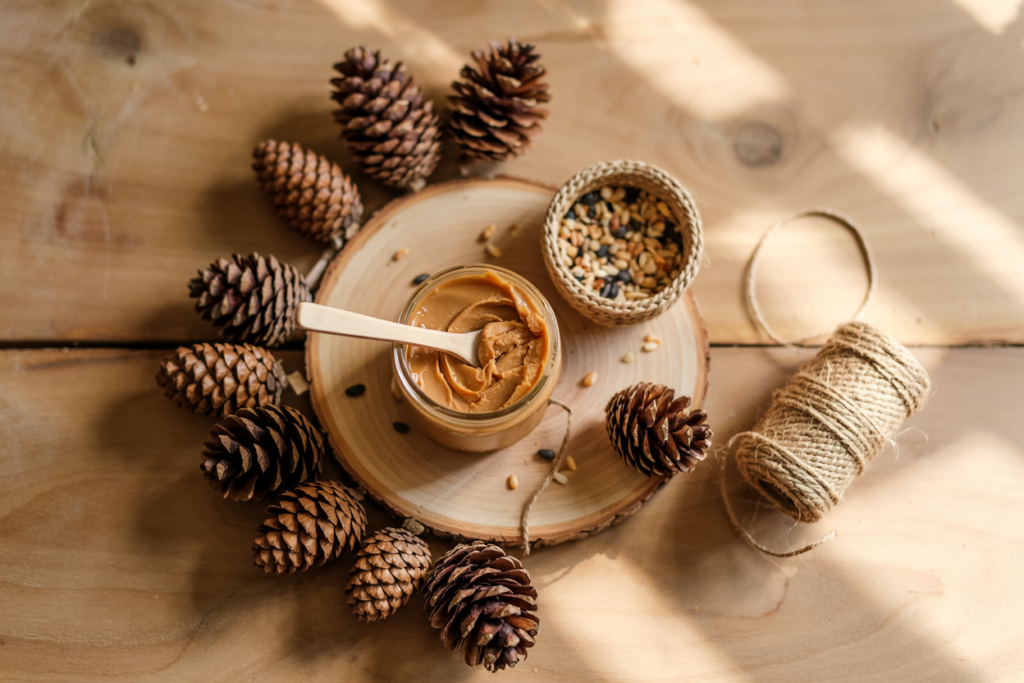
You can make a pine cone bird feeder in under 10 minutes using items you probably already have at home. All you need is a large pine cone with open scales, some peanut butter, bird seed, string, and a few basic tools. This project is perfect for kids and adults alike!
These natural feeders aren’t just great for wildlife – they’re also environmentally friendly. Hang your finished feeder from a tree branch where you can watch the birds enjoy their treat. You’ll be amazed at how quickly your feathered friends discover your homemade offering!
Gathering Your Materials
Before you start crafting your pine cone bird feeder, you’ll need to collect a few simple supplies. The right materials will ensure your feeder is attractive to birds and sturdy enough to withstand outdoor conditions.
Choosing the Right Pine Cones
Look for large pinecones with open scales that provide plenty of nooks for holding seed. Pine cones with open scales work best since they have more surface area for the bird seed to stick to. You can collect pinecones from your yard, a local park, or even purchase them from craft stores.
The best pine cones are those that aren’t damaged or broken. Their natural shape makes perfect little spaces where your sticky mixture and seeds can nestle.
Selecting a Bird-Friendly Adhesive
Peanut butter is the most common adhesive for pinecone bird feeders. Both crunchy and creamy varieties work well. It’s sticky enough to hold the seeds and provides extra protein for the birds.
If you’re concerned about peanut allergies, sun butter (made from sunflower seeds) makes an excellent alternative that’s just as bird-friendly.
Other options include:
- Suet or animal fat: These are particularly good for winter feeders as they provide extra energy for birds in cold weather
- Honey: Can be mixed with peanut butter to create an extra sticky mixture, though it works best in dry climates
Whatever adhesive you choose, make sure it’s room temperature for easy spreading. You’ll need a popsicle stick or butter knife for application.
Picking the Best Bird Seed Mix
The type of bird seed you use determines which feathered friends will visit your feeder. Standard wild bird seed mix works well and attracts a variety of species.
Black oil sunflower seeds are particularly popular with many backyard birds. They have thin shells that are easy to crack and high fat content that birds love.
Consider these seed options:
- Standard wild bird mix (attracts the widest variety)
- Black oil sunflower seeds (high-energy favorite)
- Nyjer seeds (for finches and small birds)
- Millet (attracts ground-feeding birds)
Pour your selected seeds onto a paper plate or shallow tray for easy rolling. You’ll also need some string or twine to hang your finished feeder, with about 8-12 inches per pinecone being ideal.
Preparing the Pine Cones
Before adding bird seed, you need to get your pine cones ready. This prep work ensures birds get clean, safe food and helps the seed mixture stick properly to the pine cones.
Cleaning Pine Cones
First, gather several medium to large pine cones. Red pine cones work wonderfully because they have wide, open scales that hold plenty of seed. Look for pine cones that have already opened up naturally.
Give your pine cones a good rinse under cool water to remove dirt, bugs, and sap. Shake off excess water and place them on a baking sheet.
Pop them in the oven at 200°F for about 30 minutes. This kills any insects hiding inside and opens the scales fully. It also melts away sticky sap that might be unpleasant to work with.
Let the pine cones cool completely before handling them. Tie a piece of twine or string to the top of each pine cone, creating a loop for hanging. Make sure to do this before applying any sticky mixture!
Applying the Adhesive
You’ll need something sticky to help the birdseed stick to your pine cones. Peanut butter works wonderfully and birds love it! Scoop some into a small bowl.
If you prefer a non-peanut option or have allergies, try:
- Vegetable shortening
- Lard or vegetarian alternatives
- Sunflower butter
Use a popsicle stick or butter knife to spread your chosen adhesive. Work it deep between all the scales of the pine cone. Don’t be shy – use plenty!
Make sure every nook and cranny gets covered. This gives birds more food and helps the seeds stick better. The stickier your pine cone, the more successful your bird feeder will be!
Adding Bird Seed
Once you’ve prepared your pine cone with peanut butter, it’s time for the fun part – adding bird seed! This step turns your sticky pine cone into a tasty energy source that will attract feathered friends to your yard.
Coating Techniques
The key to a successful pine cone bird feeder is getting plenty of seeds to stick. Pour your bird seed onto a plate or shallow tray first to make the process easier. Roll your peanut butter-covered pinecone in the seeds, pressing gently to help them adhere.
For maximum coverage, you might need to use your fingers to press seeds into any spots the rolling missed. Don’t worry about getting messy – this is a hands-on project!
If you’re working with kids, give each child their own plate of seeds to minimize spills. Using a popsicle stick helps spread peanut butter and keeps little hands a bit cleaner.
Remember, the more peanut butter you use, the more seeds will stick and the longer your feeder will last outside.
Bird Seed Varieties
Different seeds attract different types of birds to your feeder. Commercial wild bird seed mixes work great for attracting a variety of species.
Popular Bird Seed Options:
- Black oil sunflower seeds – high in fat, attractive to many birds
- Striped sunflower seeds – loved by larger birds
- Millet – appeals to ground-feeding birds
- Nyjer seeds – perfect for attracting finches
- Cracked corn – economical option many birds enjoy
Choosing large pine cones with plenty of space between scales gives you more surface area for seeds. This creates a better energy source for birds, especially during colder months when they need extra calories.
You can also customize your mix based on birds in your region. Consider adding dried fruit bits or crushed nuts for additional variety that will appeal to a wider range of feathered visitors.
Hanging Your Pine Cone Bird Feeder
Once your pine cone bird feeder is ready, it’s time to find the perfect spot to hang it. The right location will attract birds while keeping your feeder safe and accessible for refilling.
Selecting a Location
Choose a spot that’s visible from your window so you can enjoy watching the birds visit. Trees and shrubs make excellent hanging spots since birds feel safe around natural cover. Aim for a branch that’s about 5-6 feet off the ground.
Birds prefer feeders that aren’t too exposed to predators or harsh weather. A location with some shelter from rain and snow will help your pine cone feeder last longer. If you have cats or other wildlife nearby, hang the feeder high enough to keep curious critters from reaching it.
Try to place your feeder near trees where birds can perch while waiting their turn. This gives them a safe place to rest before approaching your tasty creation!
Securing Your Feeder
Take the string or twine you tied to the top of your pinecone and make a strong knot around your chosen branch. Make sure it’s tight enough that wind won’t easily dislodge it.
If you’re hanging multiple feeders, space them at least 3 feet apart. This prevents overcrowding and reduces competition among birds.
For extra security in windy areas, consider using a small carabiner clip between your string and the branch. This makes it easier to remove the feeder for refilling too!
Here’s a quick checklist for securing your feeder:
- Use strong twine or string (about 10-12 inches long)
- Tie a secure knot that won’t slip
- Check that the feeder hangs freely without touching other branches
- Ensure it’s stable enough to withstand light winds
Maintaining Privacy
While you want to see the birds, it’s important to respect their space. Birds may be hesitant to visit if they feel too exposed or observed.
Position your feeder where you can watch without making the birds feel threatened. A window with sheer curtains works well – you can see out, but the birds don’t feel like they’re being watched too closely.
Remember that different bird species have different comfort levels. Some bolder birds might visit feeders close to human activity, while shyer species prefer more secluded spots.